
Configure a Custom attribute widget
Publish selected custom-attribute values for Map and Table query filters.
- Add Custom attribute and open Settings.
- Choose Entity, then its Attribute.
- Enter a visible Label.
- Set a distinct Context parameter name, for example
siteClasses. - Save and configure bindings in the receiving query widgets.
Lookup attributes offer defined choices and publish selected lookup IDs. Non-lookup attributes accept comma-separated entries and publish a list of strings. Both supply lists, which SQL receives as JSON.
classes=siteClassesUse @classes with OPENJSON in SQL. See SQL parameters and selector bindings for list handling and empty-selection examples.
Changing Entity or Attribute clears the previous selection. Check the values again. Use different context names for independent selectors; adding this widget alone does not filter every widget.
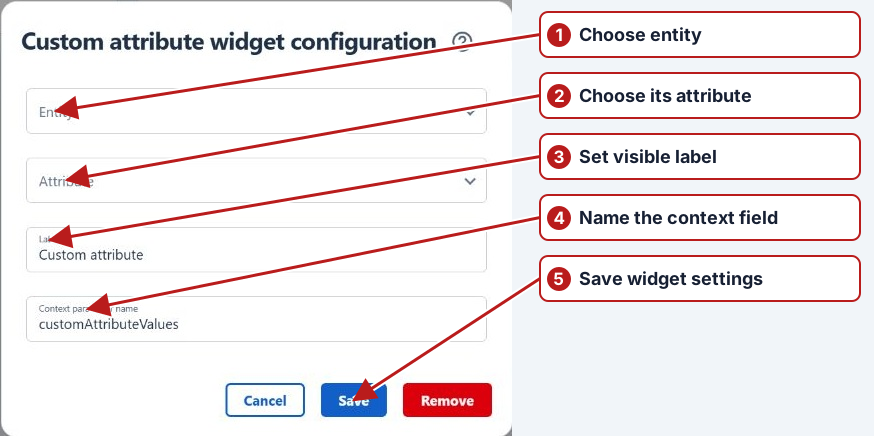
Use Configure > Save to retain settings and layout changes. Cancel discards the dialog changes; Remove removes the widget after confirmation. See Dashboard widgets for the full widget list.