
Generate QR codes
QR labels identify sample point groups or sample points. Generate labels from Samples > Sample points.
Sample point groups
- Select the group in the hierarchy.
- Choose Generate QR codes in the group toolbar. This is available for non-System groups.
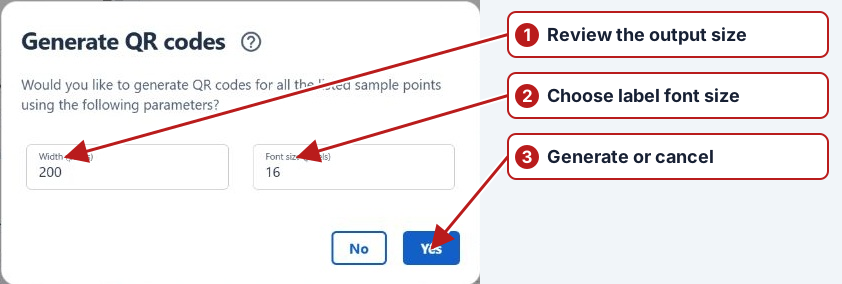
- Review Width (pixels) and Font size, then click Yes.
- Review the generated labels in the new browser window. Use the browser’s print controls to print them or save a PDF.
Group output includes the selected group and its descendants. Inactive entries depend on Show inactive.
Sample points
- Filter the sample point list to the points that need labels.
- Choose Generate QR codes in the sample point toolbar.
- Review the dimensions, click Yes, then inspect and print the generated labels.
Group and point scope
A group code identifies a group of locations; a point code identifies one measurement location. Check the chosen scope and any option to include subgroups before generating labels. Keep labels distinguishable by their displayed names and location information.
Print and field-check
Review the configured dimensions, font and included fields, then check the produced labels against the intended points. Print a representative label and verify that it remains readable at the installation location. Replace damaged labels without changing a point’s identity simply to obtain another code.
Using the label
In the Mobile app, sync while connected before field work, then tap Scan site QR code on Tasks. A group code selects the group and clears the point filter; a point code selects the point and clears the group filter. The organisation filter remains in place. The scanned location must be present in the downloaded data. Use the mobile location pickers if camera access is unavailable.