
Import result files
Use Data > Imports to upload spreadsheet or CSV result files and review their processing.
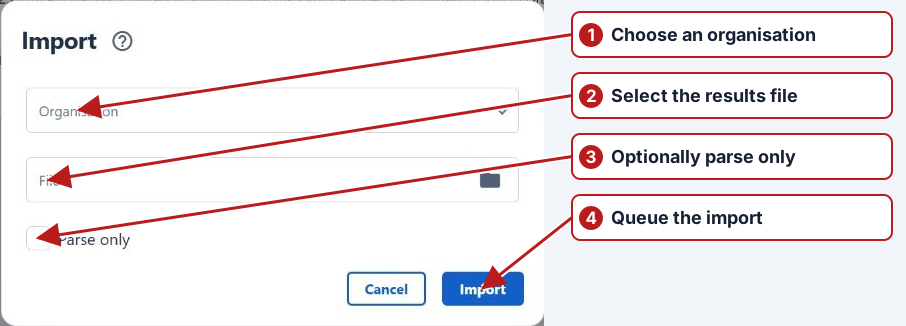
Upload a file
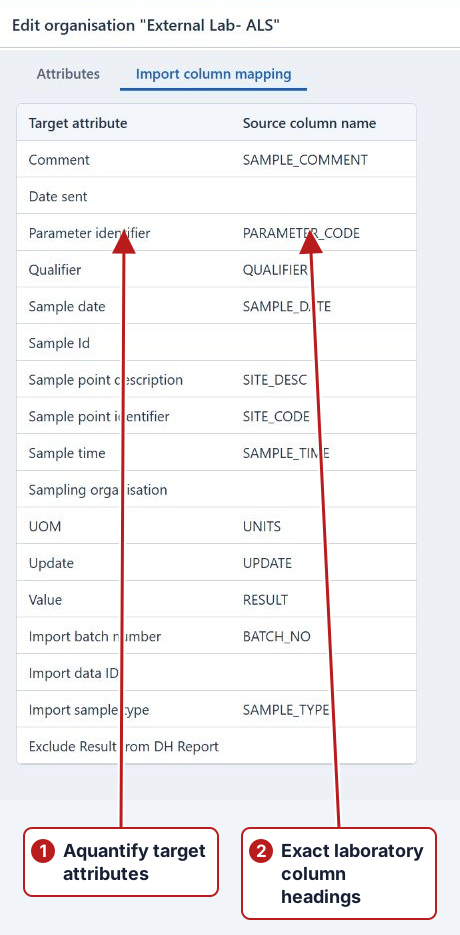
- Check that the organisation’s lab identifiers and import column mappings are configured.
- Open Data > Imports and click Add new.
- Select Organisation.
- Use Select file to choose an XLSX, XLS or CSV file.
- Enable Parse only if you want to review the parsed rows before continuing the import.
- Click Import. The file is uploaded and queued for processing.
Review processing
Search the import browser by Date imported, File name, Testing organisation or User. Review Status, Total count and Imported count.
Select an import and open More > Go to rows to review rows and validation messages. A parsed import offers Continue import; rows also offer re-validation and importing selected rows as new.
Use Go to results or Go to issues where available to review the records produced by the import.
Prepare matching first
Check the supplying organisation’s identifier attributes and Import column mapping. Confirm codes on the actual parameter and sample point records and compatible method units. Use Parse only for a validation review that should not submit results.
Review status and rows
Open the import record after processing and read its status and row messages. Correct unknown codes, unsupported values or method/unit mismatches before the intended submission. Search Events for the same processing period if an error needs investigation.