
Issue maps and follow-up tests
Open a saved issue and choose Map to show its main sample point, related locations and follow-up tests. The map can preserve visual evidence and help coordinate additional measurements during an investigation.
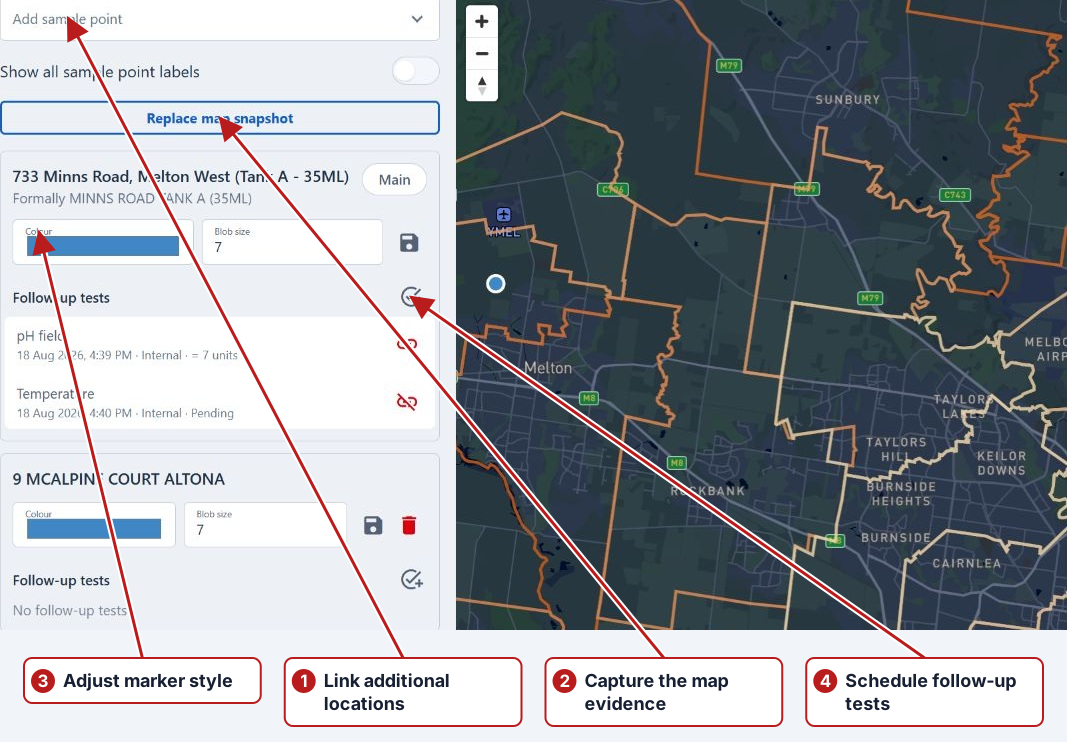
Add locations and style the map
- Check the issue’s main sample point on Attributes.
- On Map, choose an Add sample point value and use its Add button to associate another location.
- Set a location’s Colour and Blob size, then click its Save style action.
- Use Show all sample point labels, zoom and pan to make the relevant locations clear.
- Choose Capture map snapshot, or Replace map snapshot when a snapshot already exists.
Schedule a follow-up measurement
- Find the intended location card and click Add ad-hoc scheduled test beside Follow-up tests.
- Select Organisation and Parameter.
- Check From and To. The sample point is fixed to the location you selected.
- Click Save to create the scheduled test and link it to the issue.
- Open the follow-up from its list to find the task in Data > Tasks. Record the result using the normal result-entry workflow.
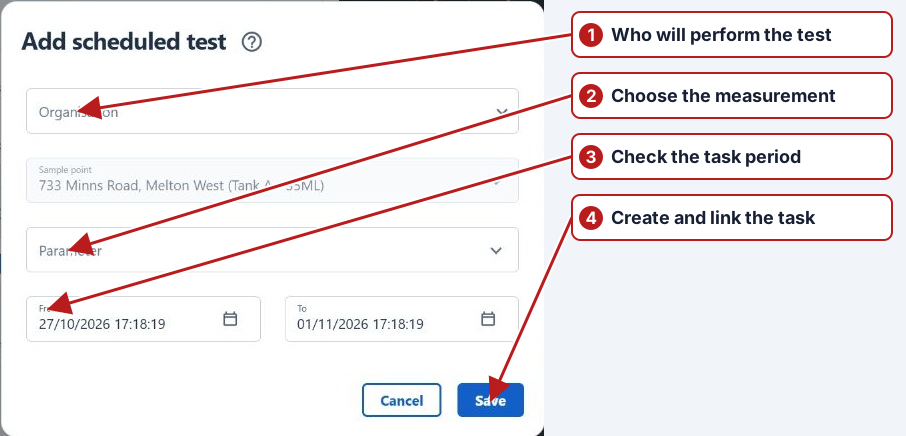
Creating follow-ups requires issue editing and program editing access. A follow-up can remain Pending until the measurement is entered. For example, use a pH test and a temperature test at the same location to keep their separate progress visible in the investigation.
Link an existing result
In Data > Tasks, select the recorded result and choose Link result to issue. Enter the saved issue’s numeric ID and confirm the link. Check the issue and location afterwards so evidence is attached to the intended investigation.
Remove an association
Unlink follow-up test removes the relationship with the issue; it does not delete the scheduled test or result. Remove a location’s follow-up links before removing that additional sample point. The main sample point cannot be removed using the Map card’s Remove action.
See Enter results, Result history and Issue status.