Mobile app
Use Aquantify Mobile to download scheduled work, record samples and results in the field, and upload them when a connection is available. The mobile app supports offline entry, QR location filters, comments, photos and ad hoc results. For entry directly into the desktop web app, see Desktop result entry.
Open the app and prepare for field work
- Open your organisation’s Aquantify Mobile address. AU2 deployments can provide /mobile/ or /mobile-next/; use the address supplied by your administrator. Keep using the same address and browser on the device that holds your staged work.
- While connected, open the Tasks menu and choose Sync. On a new device, the start screen also offers a sync link to download tasks.
- If sign-in is requested, complete your organisation’s sign-in flow and return to Sync. If email confirmation is requested, confirm the account before syncing again.
- Wait for the progress indicator to finish, then confirm that the expected tasks and locations are available before leaving coverage.
The mobile app can be added to the home screen using your browser’s app-install or Add to Home Screen option, where available. Open it while connected first so the app and working data are available before offline use. The current app uses the organisation’s sign-in page; the older native app’s API-address, Username/PIN and Connect setup screens are not part of this workflow.
Sync downloads work for the current day, including scheduled periods that span today, together with the definitions needed for entry. Sync again at the start of a new day and after relevant schedule or definition changes. A successful download from yesterday does not establish that today’s work is available.
Tasks and the mobile menu
The workflow illustrations below show the AU2 /mobile-next/ app at phone size in light mode and normal density. The appearance comparison near the end shows dark mode and compact spacing. The /mobile/ app uses the same field workflow with a different appearance.
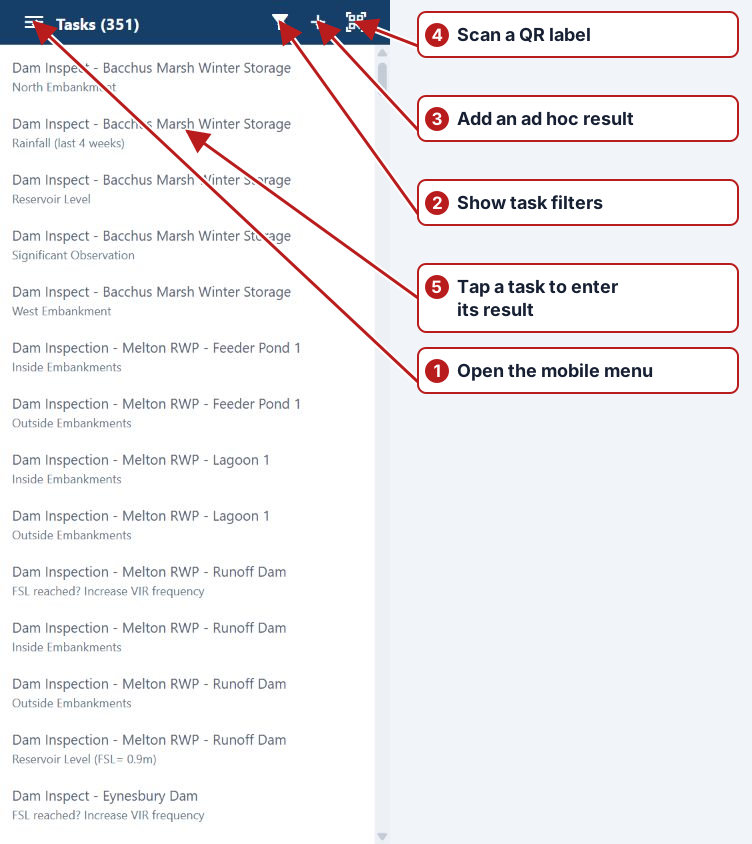
The Tasks title shows the number of tasks currently displayed. A Take sample row records collection; a row with a parameter name records a result. Completed server tasks and work already staged on the device are excluded from this list.
| Control | Use |
|---|---|
| Menu | Open Staged samples, Staged results, Sync and the app maintenance actions. Its badge combines staged samples and results; counts above nine display as 9+. |
| Open/close filter | Show or hide the Site, Sample point and Testing organisation filters. An indicator marks an active filter; closing the panel does not clear it. |
| Add ad-hoc result (+) | Record an unscheduled measurement using downloaded locations, parameters and organisations. |
| Scan site QR code | Scan an Aquantify group or sample-point label to filter the task list. |
Results that require sampling become available after the parent sample has been recorded as Sampled on this device, or submitted to the server and downloaded. Recording Not sampled does not unlock those results.
Filter by site, sample point or organisation
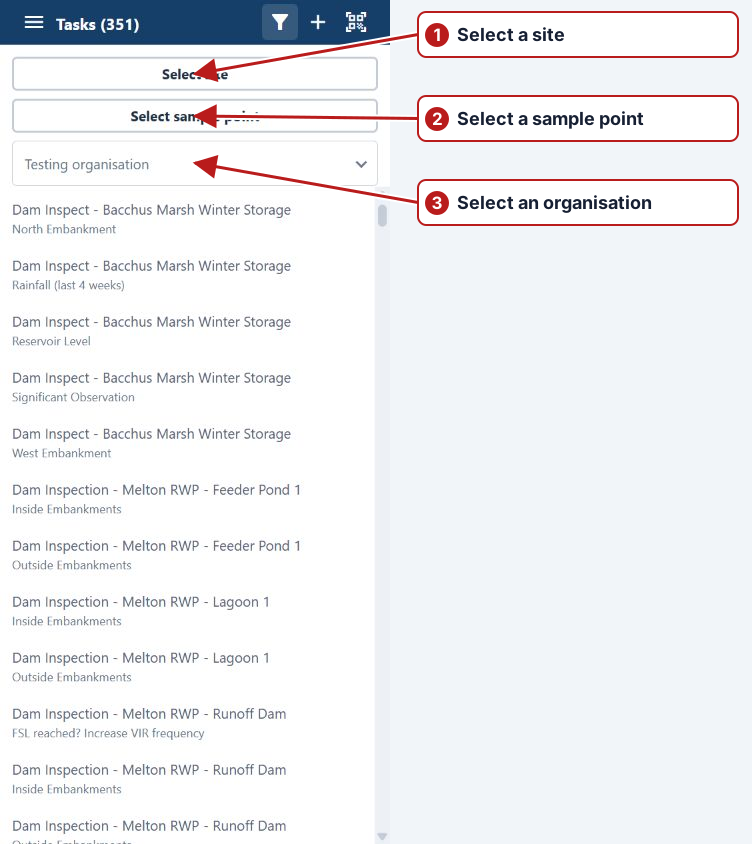
- Tap Open/close filter.
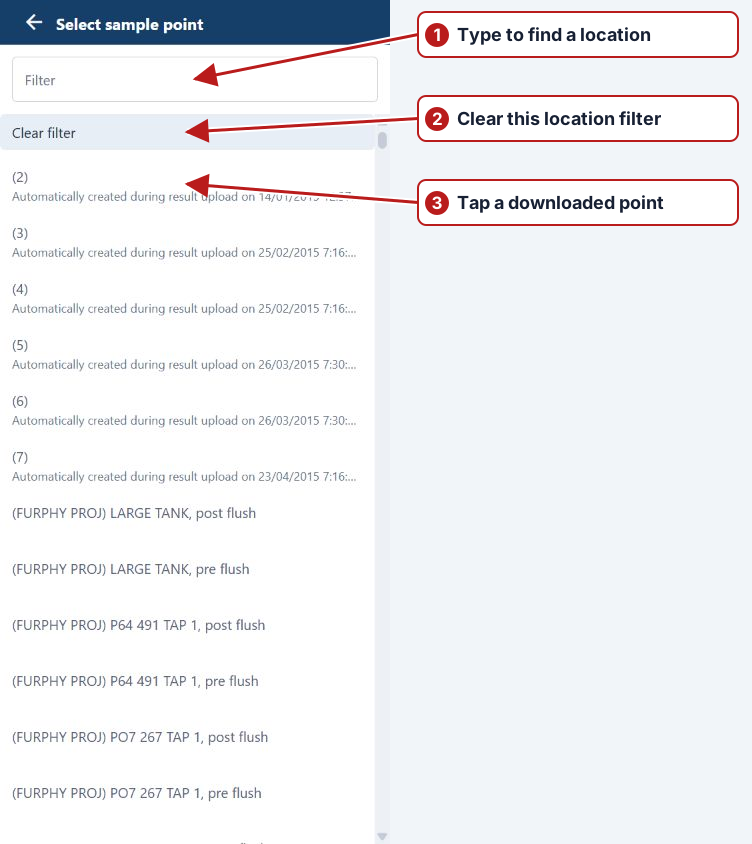
- Tap Select site or Select sample point. Type in Filter to find a downloaded location, then tap its row.
- Select a Testing organisation if needed. The list contains active internal organisations available on the device.
- Review the task list and confirm the point and parameter before opening a task.
Site, point and organisation filters apply together. To remove a location restriction, reopen its picker and choose Clear filter. Choose All organisations to remove the organisation restriction. Clearing one field leaves the others in place.
Scan a QR label
- Tap Scan site QR code and allow camera access when your device requests it.
- Point the rear camera at an Aquantify QR label. A recognised sample-point code selects that point and clears the site filter; a group code selects that group and clears the point filter.
- Check the resulting filter and task count. The Testing organisation filter remains in place.
Current identifiers and supported legacy numeric QR identifiers are recognised. The identified location must exist in the device’s downloaded data. If Invalid QR Code appears, check the label and sync while connected. If the camera is unavailable, use the location pickers. See Generate QR codes for label setup.
Record a Take sample task
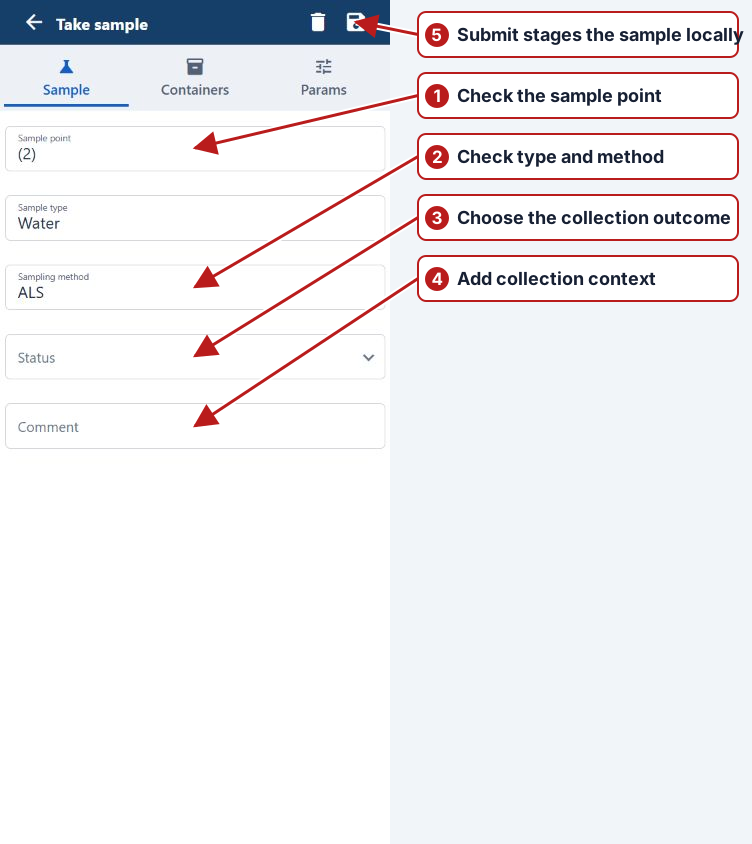
- Tap a Take sample row. Check Sample point, Sample type and Sampling method.
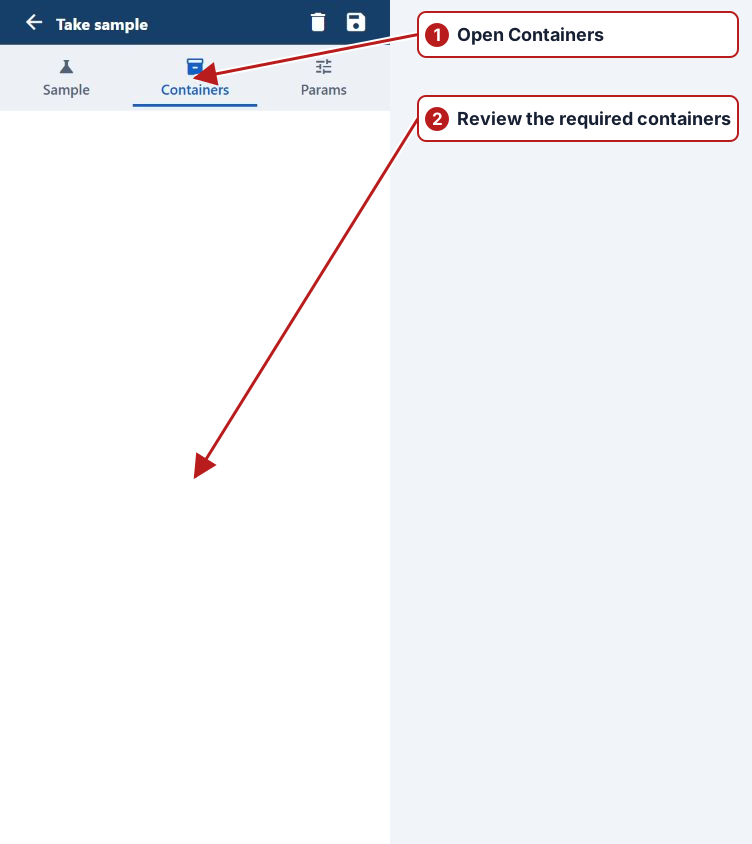
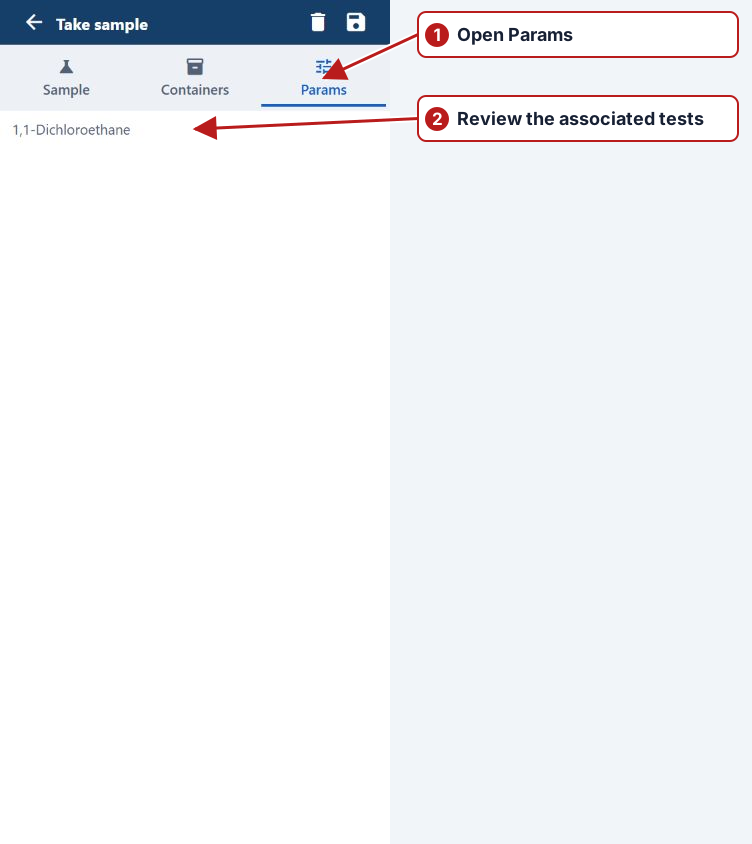
- Review Containers for the required container types and Params for the associated parameters.
- On Sample, choose Sampled or Not sampled and add the collection explanation in Comment as appropriate.
- Tap the save icon (Submit sample in /mobile-next/). The sample moves to Staged samples and is removed from Tasks.
A new sample records the device’s current time when its editor is opened. The current mobile form does not expose an editable sample-date field. Record the outcome at collection time.
Enter a scheduled result
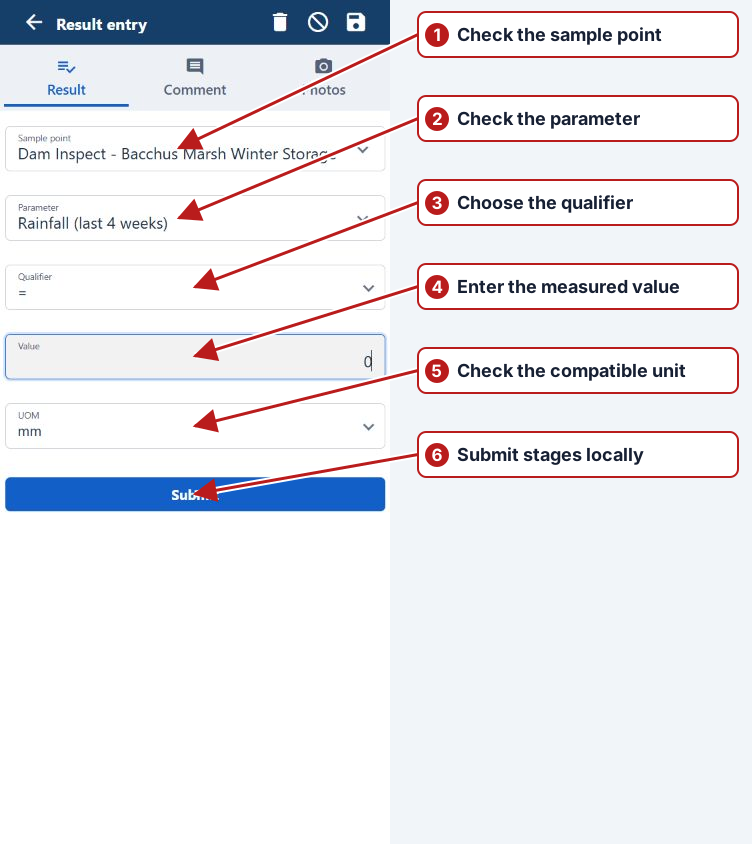
- Tap the task with the intended sample point and parameter. These fields are fixed for scheduled entry.
- Enter the Value, or select an available lookup value. Where offered, set the Qualifier (=, < or >) and a compatible UOM.
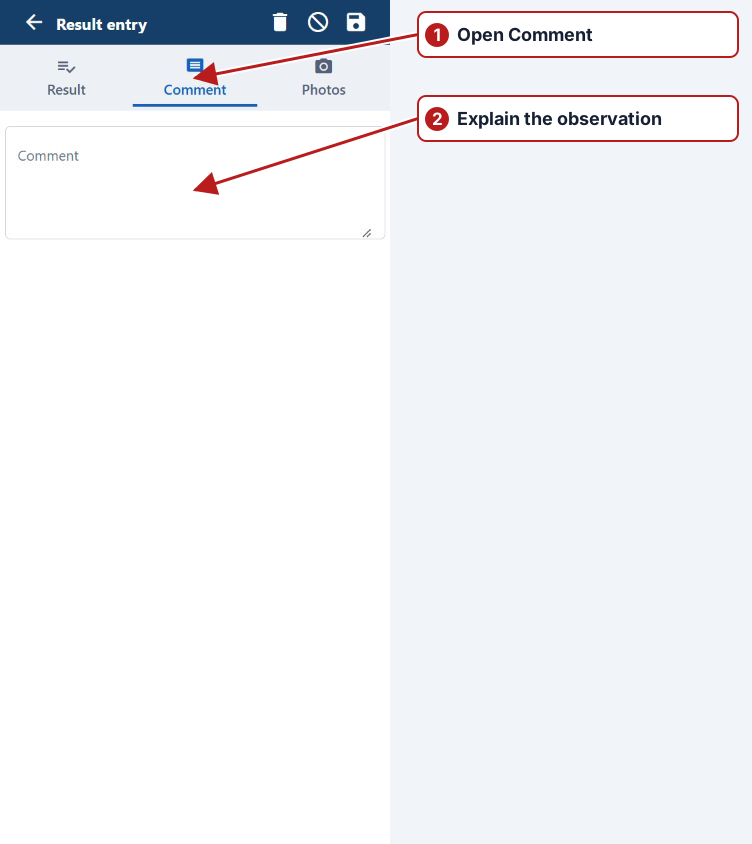
- Open Comment to add observation context.
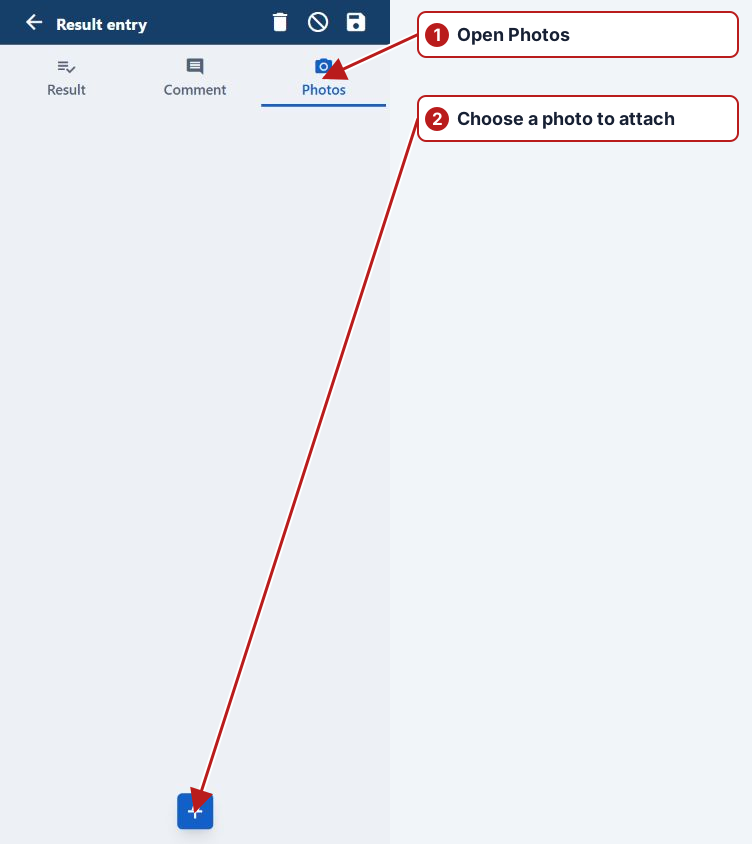
- Open Photos and tap the plus icon to choose an image using the device’s file/photo picker. Camera choices depend on the device. Review attached images and use their delete icons to remove unwanted attachments before submitting.
- Tap Submit or the save icon. Resolve any validation message, then submit again.
The result moves to Staged results and disappears from Tasks. A new result records the current time when its editor is opened; the current mobile form does not expose an editable result-date field. Attached photos remain with the staged result until Sync uploads them.
Downloaded data-entry limits block saving a breached value; check the measurement and unit. Other applicable limit breaches require a Comment before staging. Sync can still report server-side submission errors, so a locally staged value is not proof of successful upload.
Enter No result
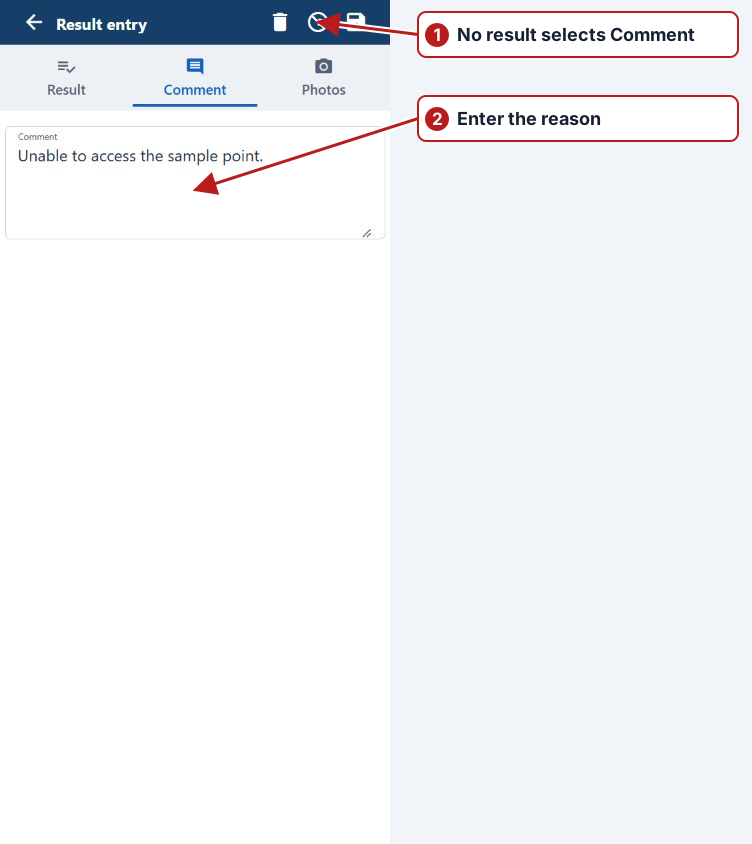
When a measurement is unavailable, tap No result in the result toolbar, open Comment and enter the reason, then tap the save icon. No result is distinct from zero and from a pending task. A comment is required. Tap No result again to return to ordinary value entry before saving if you selected it accidentally.
Add an ad hoc result
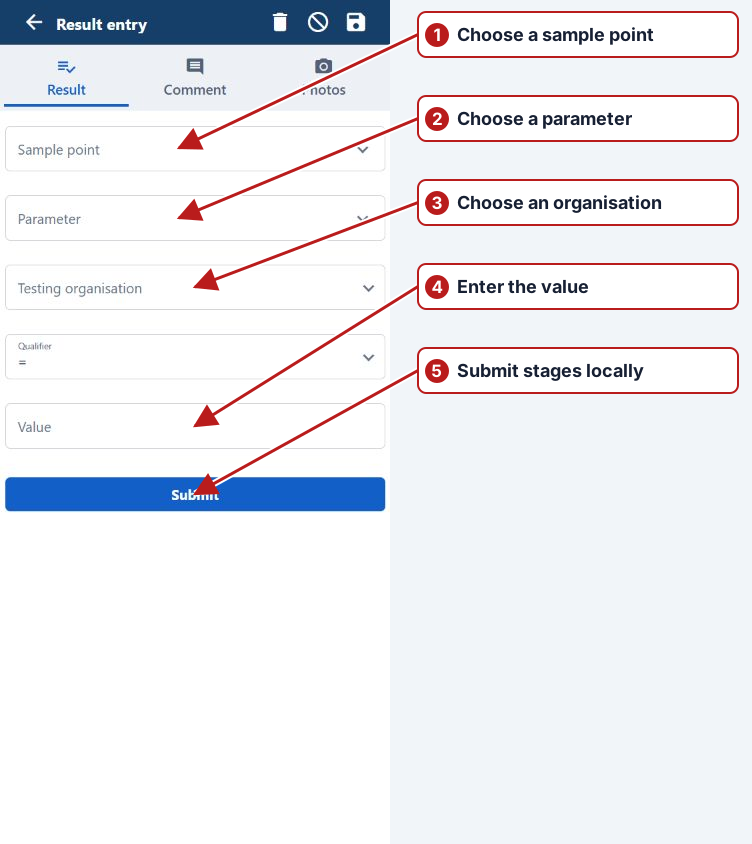
- From Tasks, tap Add ad-hoc result (+).
- Select Sample point, Parameter and Testing organisation from the downloaded choices.
- Enter the value, compatible unit, comment and photos as needed, then Submit. The result joins the local staged queue for the next Sync.
Review, correct or delete staged work
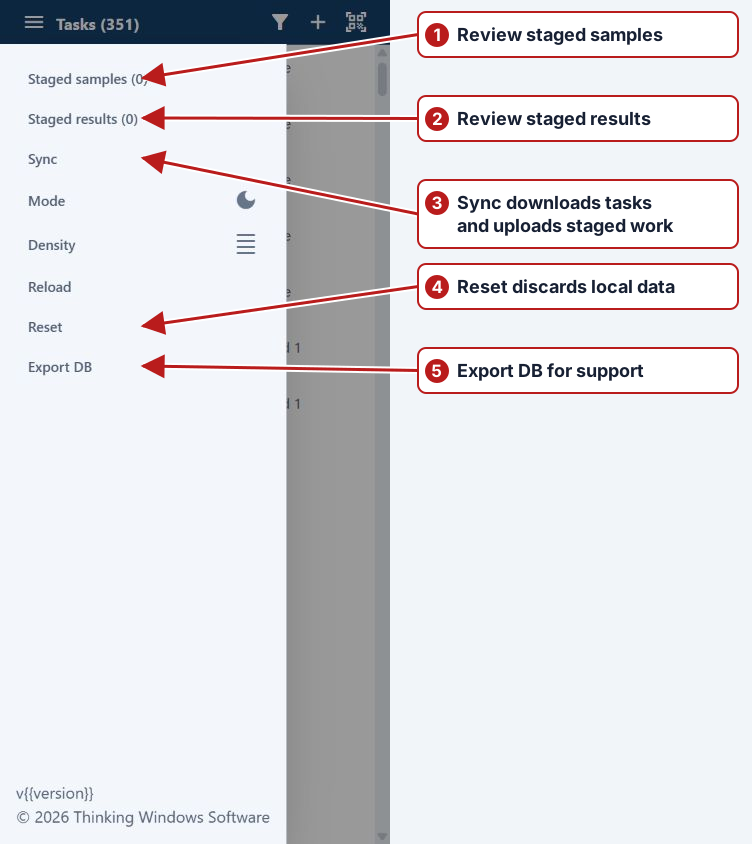
Open the Tasks menu and choose Staged samples or Staged results. Tap a row to reopen it, make the correction and submit again to update its local copy. These lists are the place to find work that has disappeared from Tasks after entry.
To discard an unsent entry, open its editor and tap the delete icon, then review the confirmation. Deleting a staged entry removes the local outcome; an eligible scheduled task can reappear in Tasks. It does not delete an outcome already uploaded to the server. Use Desktop result entry for authorised changes to server results.
Sync and confirm upload
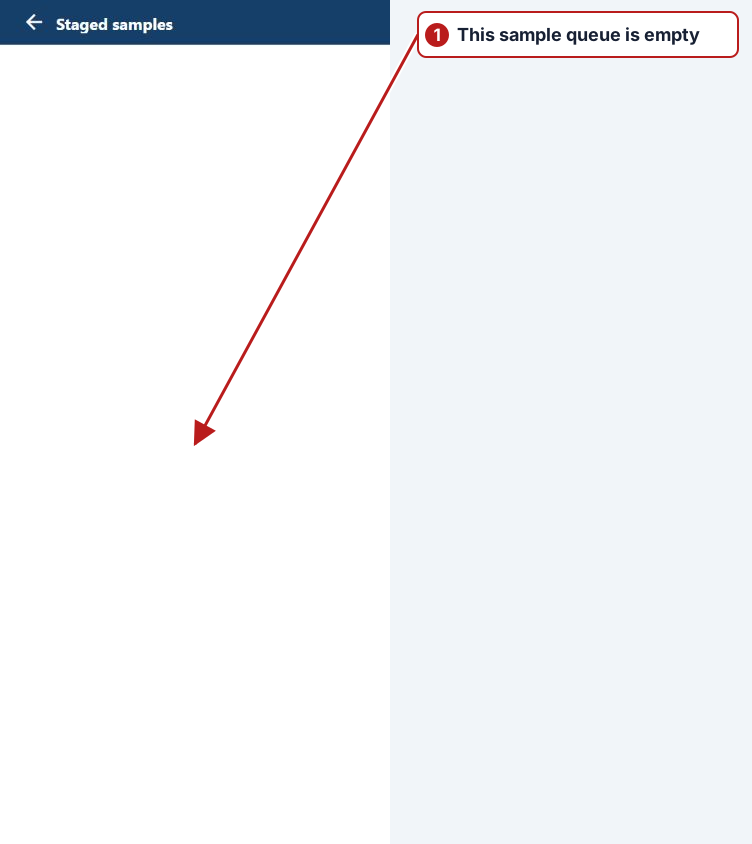
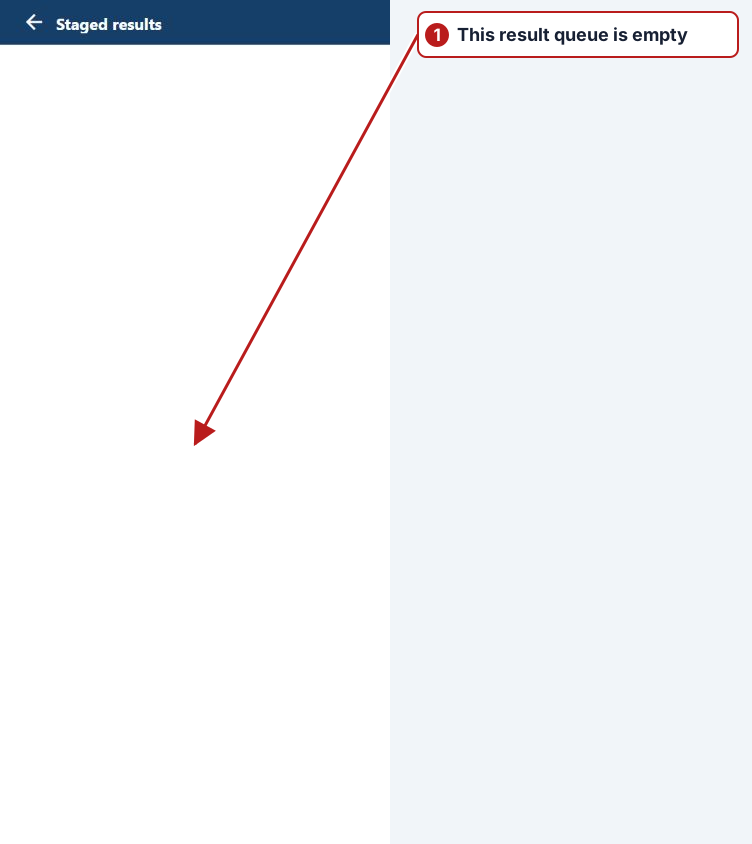
- Reconnect to the internet and open the Tasks menu.
- Choose Sync. It is disabled while the device reports Offline.
- Wait for processing. Samples upload before results, and result photos upload with their result. Sync also downloads changes to tasks and definitions.
- Open both staged lists. Successfully submitted entries are removed. Results that failed submission remain staged; a failed result has an ! indicator and its editor shows Sync error.
- If Sync reports errors, open the affected staged entries, review the error, correct the entry or resolve the reported account/data problem, and sync again while connected. A staged sample editor also displays its Sync error.
A network indicator alone does not prove that the Aquantify server is reachable. If Sync is interrupted or fails, review both queues before assuming the round is uploaded. Photos can increase upload time; attach the images needed to explain the observation. If a new-version message appears, use Reload, then retry Sync.
Offline storage and app maintenance
Downloaded tasks and staged work belong to this browser’s local storage at the mobile address. Keep that storage until you have confirmed upload; clearing site data, switching browsers or moving to another mobile address does not carry the queue with you.
| Menu action | Purpose |
|---|---|
| Mode | Switch between light and dark appearance. |
| Density | In the /mobile-next/ app, switch between normal and compact spacing. |
| Reload | Reload the app while connected, for example after a new-version prompt. This does not perform Sync or deliberately clear the staged database. |
| Export DB | Download the local database for support investigation. The file contains downloaded data and staged work; share it only through your organisation’s approved support process. Export is not an upload or a built-in restore operation. |
| Reset | Clear the device’s local database, including staged samples and results, and sign out while connected. Use only when you intend to discard that local data. |
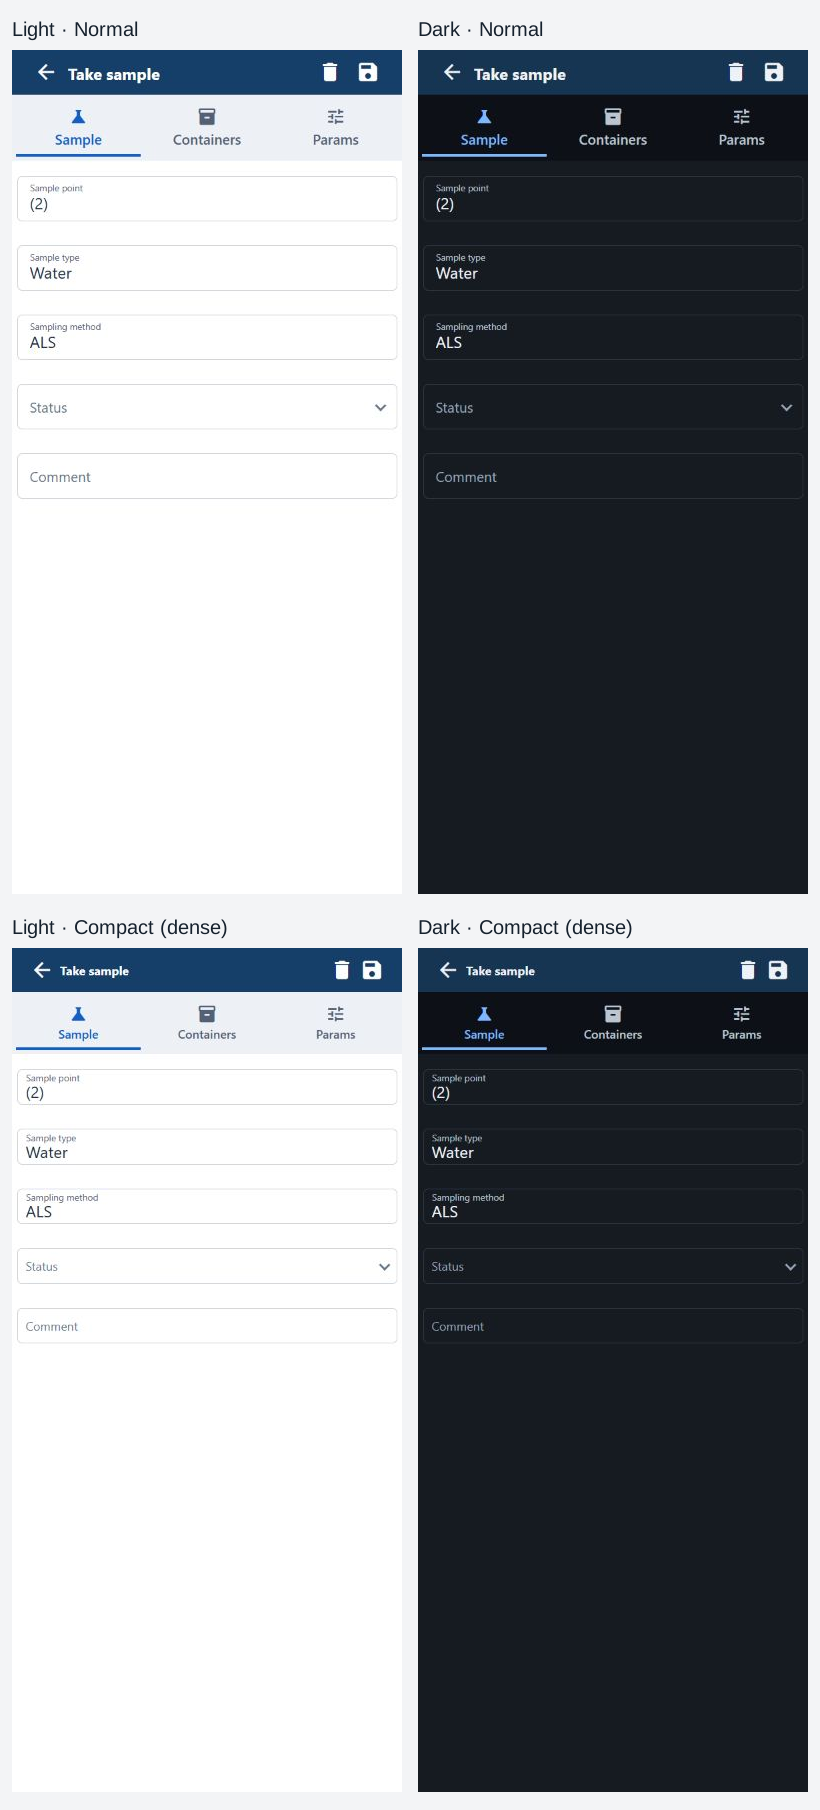
The app version is shown at the bottom of the Tasks menu. Include it and the Sync error when reporting a problem. Menu placement and appearance differ between the two AU2 mobile versions, but both use Tasks, local staging and Sync.