
Importing result files
Laboratory files use their own parameter codes, location codes, columns and units. Complete the organisation’s matching setup before importing. The import process must identify both the measurement and its sample point, interpret dates and values, and find a compatible method.
1. Define laboratory identifier attributes
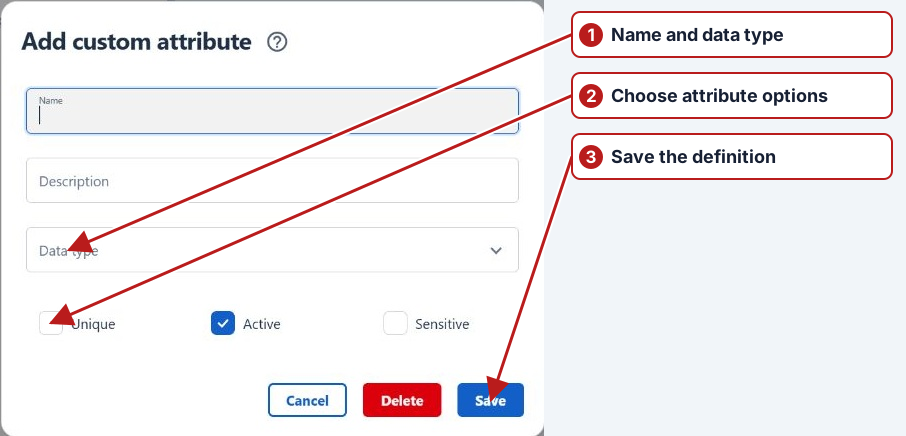
Create a Parameter custom attribute for the lab’s parameter identifier and a Sample point custom attribute for its location identifier. Choose a data type that preserves the supplied code, including leading zeros where relevant. Different laboratories can use different attributes for the same Aquantify record.
2. Populate the actual records
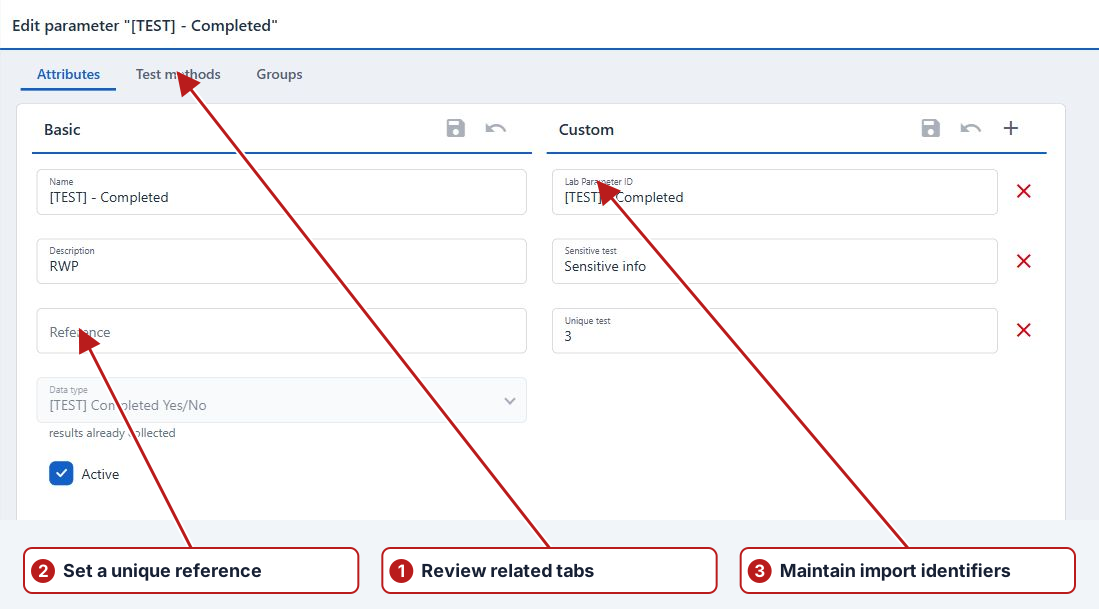
Open each parameter or sample point and add the identifier in its Custom panel. Save those values. The attribute definition is only the field; the value on the record establishes the match.
| Aquantify record | Attribute | Example lab code |
|---|---|---|
| Ammonia parameter | Lab Parameter ID | NH3-N |
| Inlet sample point | Lab Sample Point ID | INLET-01 |
Ensure a laboratory identifier identifies the intended record without ambiguity. Do not replace the calculation Reference with a lab code merely to make an import work. Changing an identifier affects matching of subsequent files.
3. Choose the matching attributes on the organisation
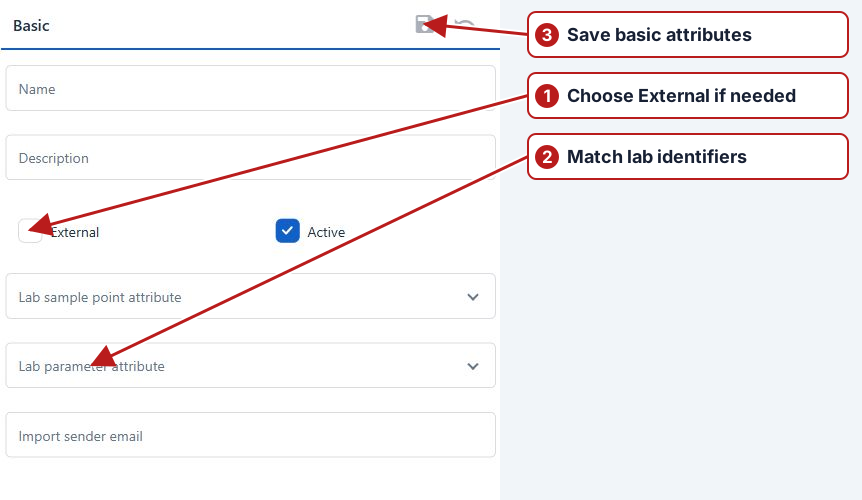
Open the supplying organisation’s Attributes. Select Lab sample point attribute and Lab parameter attribute that hold its codes. Review External and Active state. For automatic email imports, configure the recognised Import sender email and the deployment’s monitored import process.
4. Map source columns
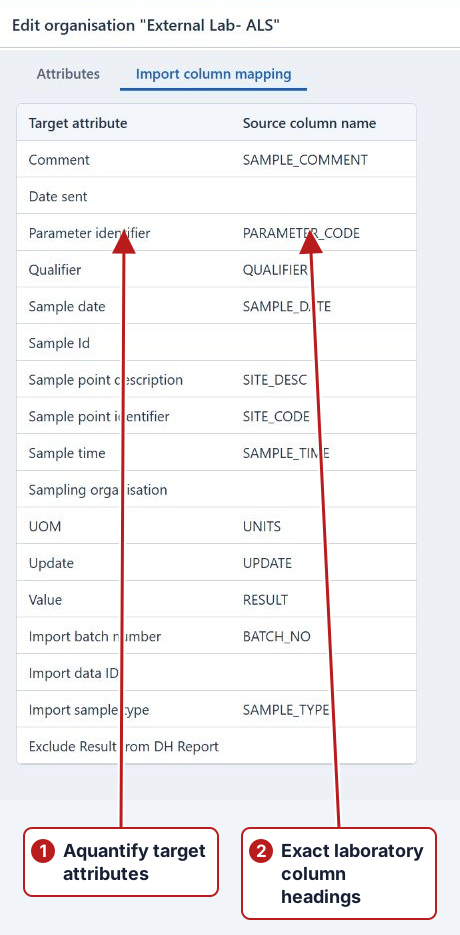
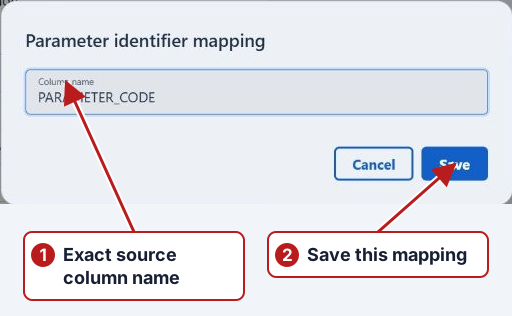
Open Import column mapping. Edit each relevant target row to enter the exact file heading. Map the parameter and point identifiers, sample date and time, value, unit and the supported qualifier or comment fields. A column heading and a value stored inside that column are different things.
| Target | Example file heading | Example cell |
|---|---|---|
| Parameter identifier | PARAMETER_CODE | NH3-N |
| Sample point identifier | SITE_CODE | INLET-01 |
| Sample date | SAMPLE_DATE | A date in the supported file format |
| Value | RESULT | 250 |
| UOM | UNITS | µg/L |
5. Check methods, units and task matching
The identified parameter needs an applicable method at the sample point and date. A result in µg/L can be converted to mg/L when that compatible conversion is defined. A water result in mg/L cannot be matched to a soil method in mg/kg using a simple scale factor. Confirm the testing organisation and scheduled work context when a file is expected to update existing tasks.
6. Parse and review a file
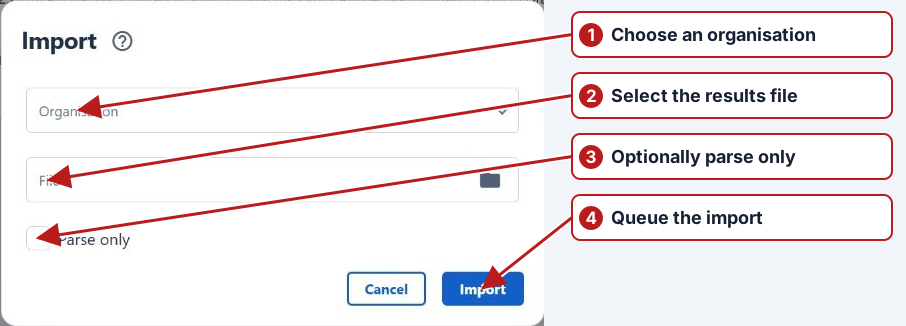
- Open Data > Imports and Add new.
- Select the supplying organisation and file.
- Use Parse only when you intend to validate the file without submitting its results.
- Submit the chosen action only when its purpose and organisation are correct.
- Inspect the import record’s status, row details and messages.
- Correct matching or source data problems, then review the intended import action again.
Diagnose a rejected or unexpected row
| Symptom | Check |
|---|---|
| Unknown parameter or point | Organisation’s chosen attribute, code on the actual record and source column heading |
| Unexpected date or period | Sample date/time mapping, source values and relevant task period |
| Unit or method error | Applicable location/date method, unit name and compatible conversion |
| Value rejected | Parameter data type, qualifier handling and source value |
| Unexpected update | Existing task/result, supported update fields and organisation context |
Automatic imports and notifications
Automatic imports require the configured monitored email process and recognised sender; entering an address alone does not configure the deployment’s mailbox processing. Notification rules can target successful processing and failures separately. Associate rules with a group containing the intended recipients.
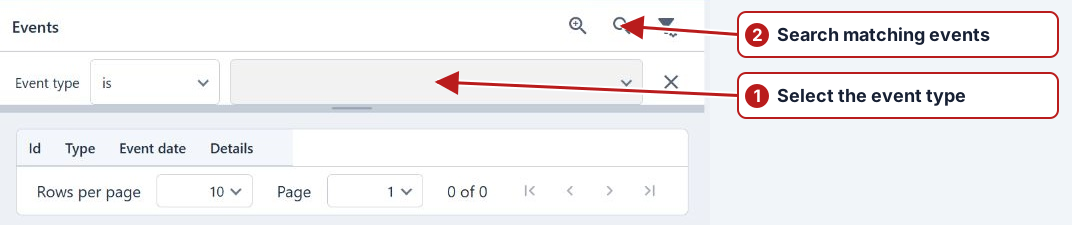
Search Events around the receipt or processing time for the import-related event and inspect details. Confirm success in the import record and the recorded task results rather than relying only on an email. Keep the original file available when reporting a problem.
See Custom attributes, Methods and Notifications.