
Parameters Menu
Parameters
This screen is accessed via the Parameters>Parameters menu item.
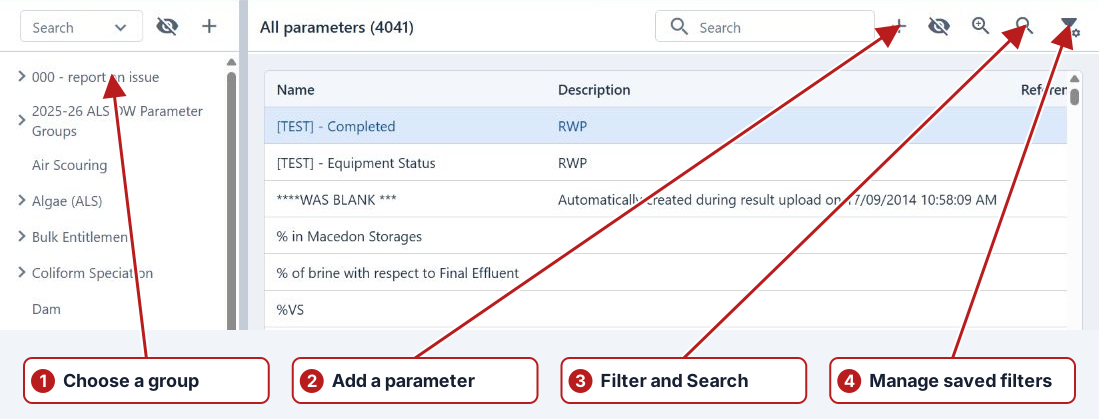
This screen allows you to -
- Create, Edit and Delete Parameter Groups
- Show/Hide Inactive Parameter Groups
- Search for Parameter Groups
- Create, Edit and Delete Parameters
- Add/Delete Parameters to a Parameter Group
- Search for Parameters
- Manage Parameter Filters
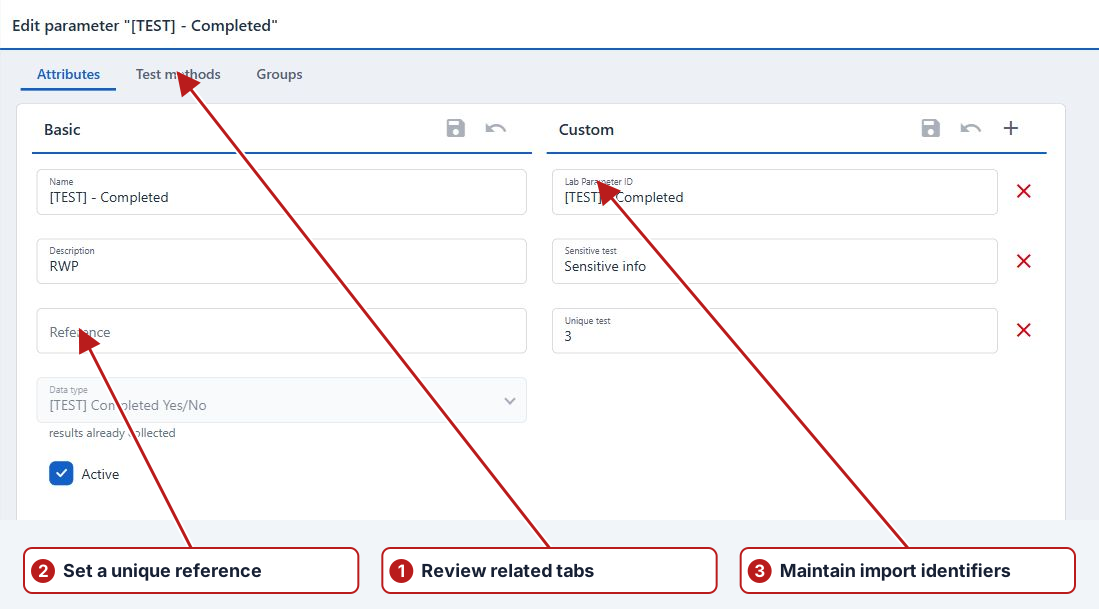
See- How to Add a Parameter Group, How to Add a Parameter, How to Add an Existing Parameter to a Parameter Group, How to Delete a Parameter from a Parameter Group
Manage Filter
Clicking on the Manage Filter button allows you to -
- Save as new - save the current filter set in an existing or new Folder. Enter its Name and Description, then select Roles for access. Use Update last to update the last-used saved set.
- Recently Used - lists recently used filter sets, for quickly reapplying a recent search
- Search for filter set(s) by Name or Description
- Clear all current filters
- Select a saved stand alone filter, or a filter from a folder
Grouping Filters into a Folder
All browsers with the Manage Filter functionality, not only allow you to save the filter set for future use, but also lets you group filters into a Folder. The Filter Management pop up screen also includes a Search field which allows you to search for a Filter by Name or Description.
Creating a new filter folder
This functionality is available on the following browsers
- Data - Tasks, Result charts, Events
- Parameters - Parameters, Limits,
- Samples - Sample Points
- Issues - Issues
- Schedule - Programs
- Manage - Holidays
Folder and Filter Search Field
The Filter Search field allows you to search for a Filter by Folder Name or by Filter Name or Description.
The following search locates the Folder -
| Search text | Expected matches |
|---|---|
| Folder name | Saved sets whose folder matches the search |
The following search locates the Filter Name -
| Search text | Expected matches |
|---|---|
| Filter name or description | Matching saved filter sets |
Clearing Current Filters
Clicking on Clear will remove all current Filters on the browsers which allows you to quickly set up a new search.
See- How to Use the Manage Filter on a Browser
Limits
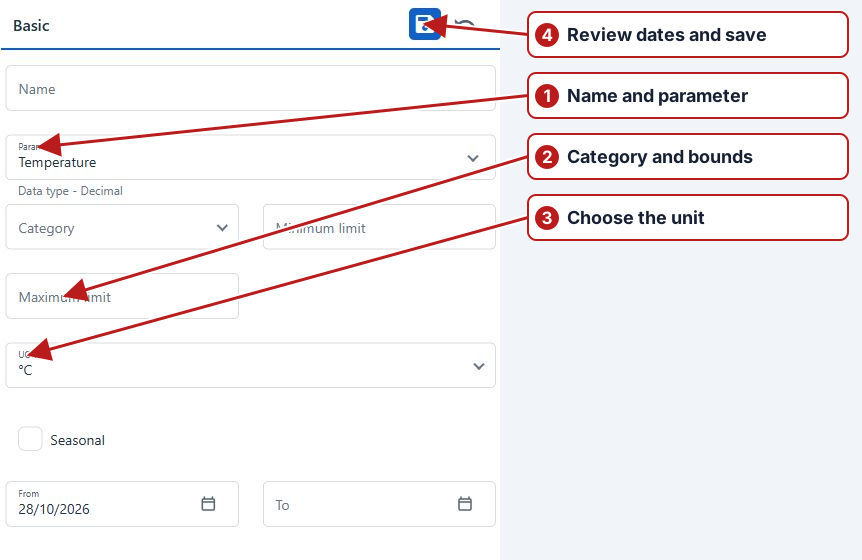
This screen allows you to add, edit and delete Parameter Limits. Define the Parameter, category, unit, thresholds and applicable dates, then assign the required locations. A Limit without location associations is inactive.
Alert Limit Types
This screen allows you to -
- Add, Edit and set the Active state of Alert Limit Types
- Define whether an Alert Limit Type breach requires a mandatory Issue to be raised
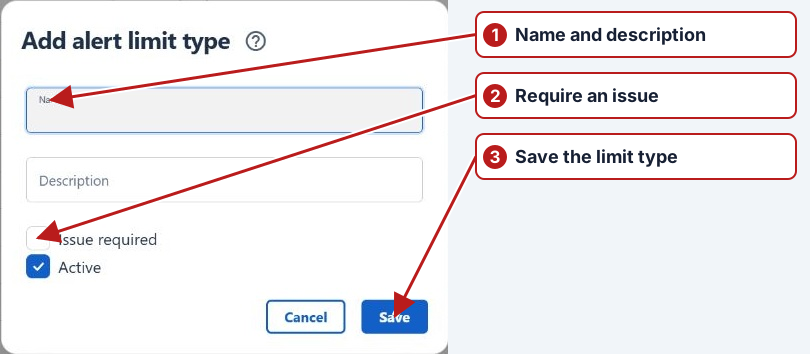
See - How to Add an Alert Limit Type
Ordering
Parameter Ordering can only be set up for a Sample Point Group OR a Parameter Group.
Go to the Parameter>Ordering screen -
Parameter Ordering By Sample Point Group
Search for and select a Sample Point Group from the drop down list, which will display a list of scheduled tests at Sample Points associated to the selected Sample Point Group. You can then order the Sample Point/Parameters by selecting and dragging to the desired order for the Sample Point Group.
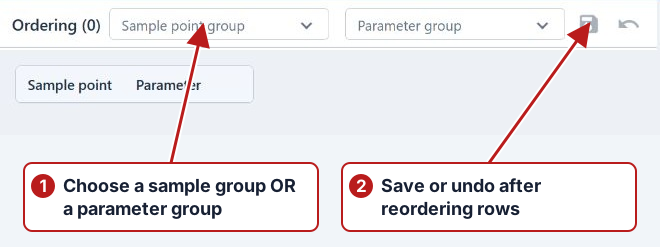
On the Data Tasks screen if you use the Sample Point Group and Datefilters, pending Results will appear in the Sample Point Group order you previously set.
| Selection in Tasks | Presentation |
|---|---|
| Sample Point Group and Date filters | Pending results use the group’s configured order |
Parameter Ordering By Parameter Group
Search for and select a Parameter Group from the drop down list, then order the Parameters by selecting and dragging to the desired order position.
On the Data Tasks screen if you use the Parameter Group and Datefilters, pending Results will appear in the Parameter Group order you previously set.
| Selection in Tasks | Presentation |
|---|---|
| Parameter Group and Date filters | Pending results use the configured Parameter Group order |
Expressions
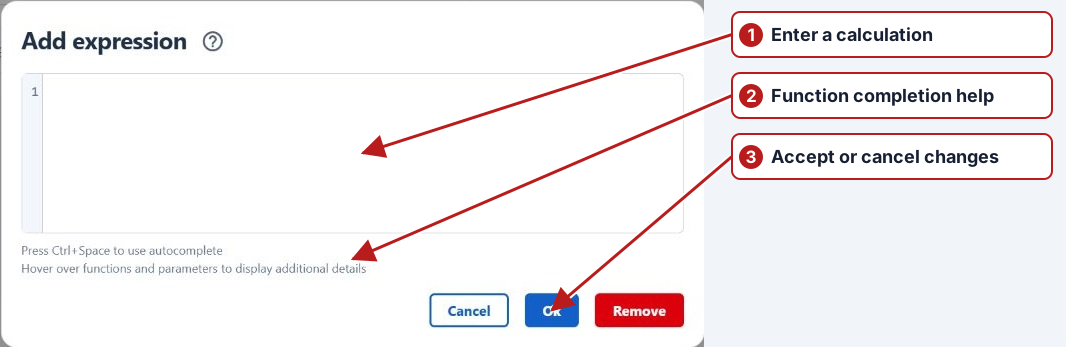
Use the Parameters browser’s Has expression and Expression filters to find calculated parameters. Open the Parameter’s Test methods and inspect the Method’s Expression. For an actual calculated Result, open Calculation details in Tasks to inspect the dependencies.
Instruments
The Instruments screen is accessed via the Parameters>Instrument types menu item.
Instruments must be associated to an Instrument Type. So after an Instrument Type has been defined you can then define an Instrument and associate it to an Instrument Type. The association between the Parameter and the Instrument is defined on the Parameter Method screen. At the time of Result entry the appropriate Method will be used with the Instrument association.
This screen allows you to -
- Create, edit and delete Instrument Types
- Search for Instrument Types
- Create, edit and delete Instruments
- Add/delete Instruments association to an Instrument Type
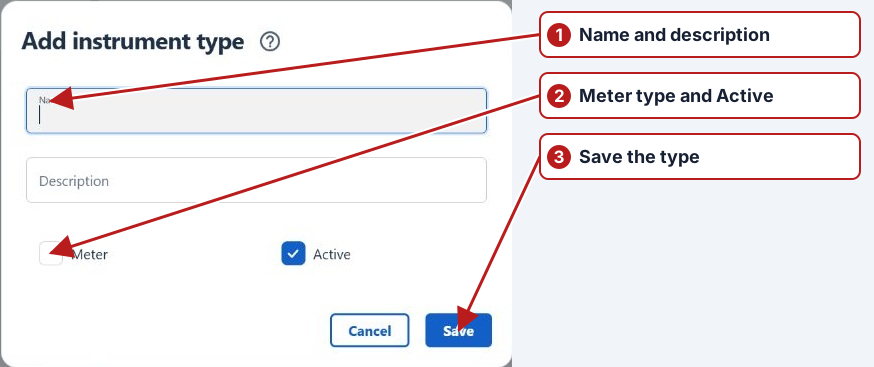
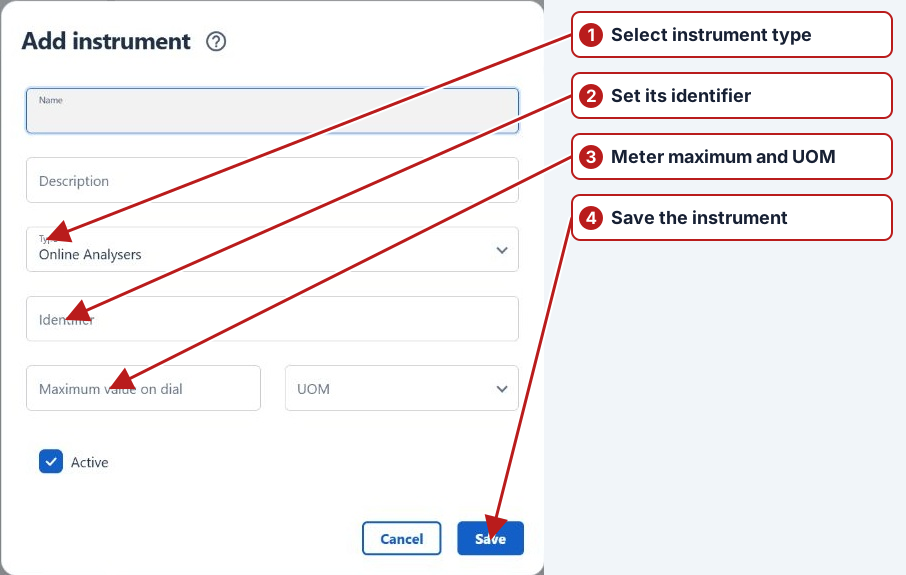
See - How to Add an Instrument Type, How to Add an Instrument
Units of Measurement
The Units of Measurement screen is accessed via the Parameters>Units of measurement menu item.
This screen allows you to -
- Search for Unit of Measurement Types
- Create, Edit and Delete Unit of Measurement Types
- Create, Edit and Delete Units of Measurement
- Add/Delete Units of Measurement association to a Unit of Measurement Type
- Search for Units of Measurement
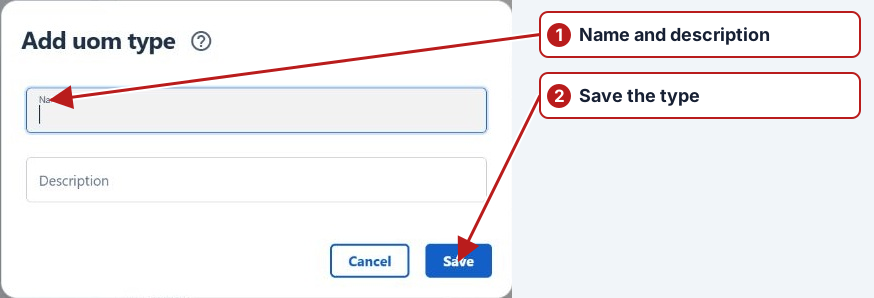
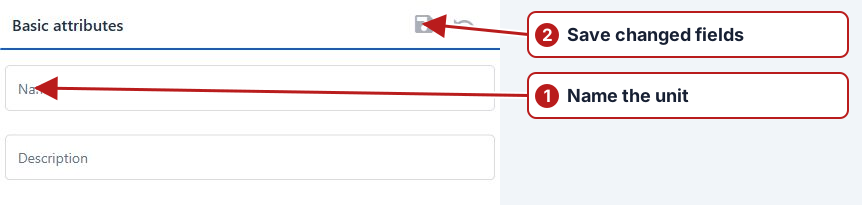
See - How to Add a Unit of Measure Type, How to Add a Unit of Measurement
UOM Conversion
When you define a Parameter Method in Aquantify you select the Units of Measurement(UOM) for that Method. Each Parameter can have one or more Methods, one as the Default (which applies to all Sample Point Groups and/or Sample Points) and then other Methods for specific Sample Point Groups and/or Sample Points. At the time of Result entry the system determines which Method to use and it is the Method UOM that is displayed on the Result entry screen.
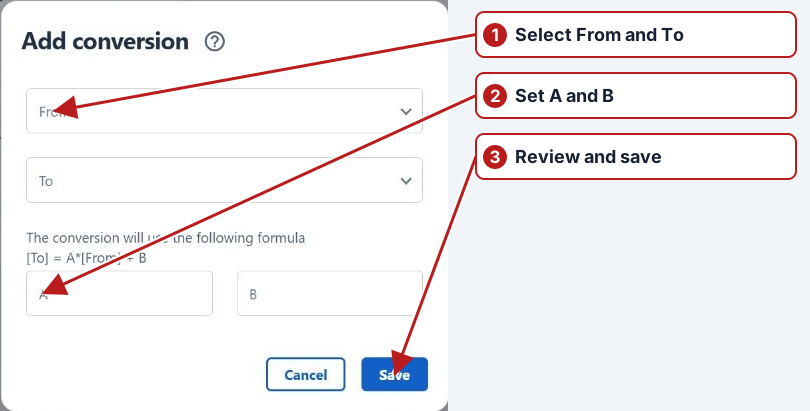
Aquantify allows you to define UOM Conversions. Having system defined UOM conversions allows a Result to be entered in a different and compatible UOM. This applies to Results entered manually or imported automatically.
For example, the system determined Parameter Method UOM may be µg/L. By having a UOM Conversion defined in Aquantify from mg/L to µg/L, you can enter a Result manually by choosing mg/L as the UOM. The system can also automatically import a Result for this Parameter if it is reported in mg/L.
Defined UOM conversion -
| From | To | Factor |
|---|---|---|
| mg/L | µg/L | 1000 |
In the following example, the Default Method UOM for Parameter G is µg/L. At the time of Result entry, by default µg/L is displayed as the UOM, however any compatible UOM where a conversion exists, will also be displayed in the drop down list.
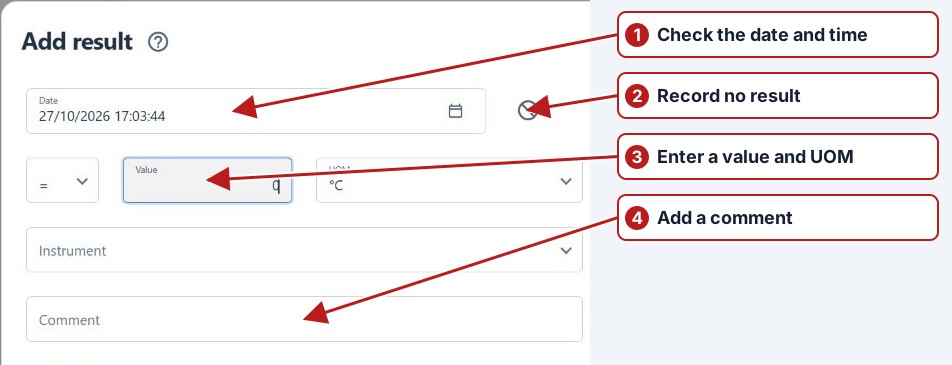
Importing a Result file where the Result for Parameter G is in mg/L imports successfully with the Result automatically being converted to the default UOM of µg/L.
| Method unit | Entry unit | Entered Result | Converted Result |
|---|---|---|---|
| µg/L | mg/L | 1.1 mg/L | 1100 µg/L |
In this example a Limit has also been breached.
| Reported Result | Method Result | Alert range | Outcome |
|---|---|---|---|
| 1.1 mg/L | 1100 µg/L | 800–1000 µg/L | Imported with compatible conversion; upper alert limit breached |
See - How to Add a Unit of Measure Conversion